How To Add Fonts In Kinemaster [Quick Tip 2023]

Are you looking to add some flair and personality to your next video project? And considering how to add fonts in kinemaster then worry no more. We shall answer all your query through this blog post.
Adding fonts is one of the best and quickest ways to customize any project, giving it a unique feel. If you’re using Kinemaster for your projects, then this blog post is perfect for you.
Kinemaster is a professional mobile video editing app that allows users to create stunning videos with minimal effort. All of the features found in other high-end video editings software -such as keyframe animations, blending modes, and audio filters can be found in Kinemaster, giving creators access to a plethora of creative options at their fingertips.
We’re going to take an in-depth look at how easy it can be to add fonts into Kinemaster so that you can quickly get started creating amazing videos with stylish typography every time. So, roll up your sleeves, and let’s dive right in.
Contents
How To Add Fonts In Kinemaster?
Different font types are supported by the excellent video editing program Kinemaster. You will be able to add a unique and creative touch to your videos by using various types of fonts in Kinemaster.
Here are some methods that you can use to add fonts in Kinemaster.
1. Adding Fonts Using the Kinemaster Asset Store:
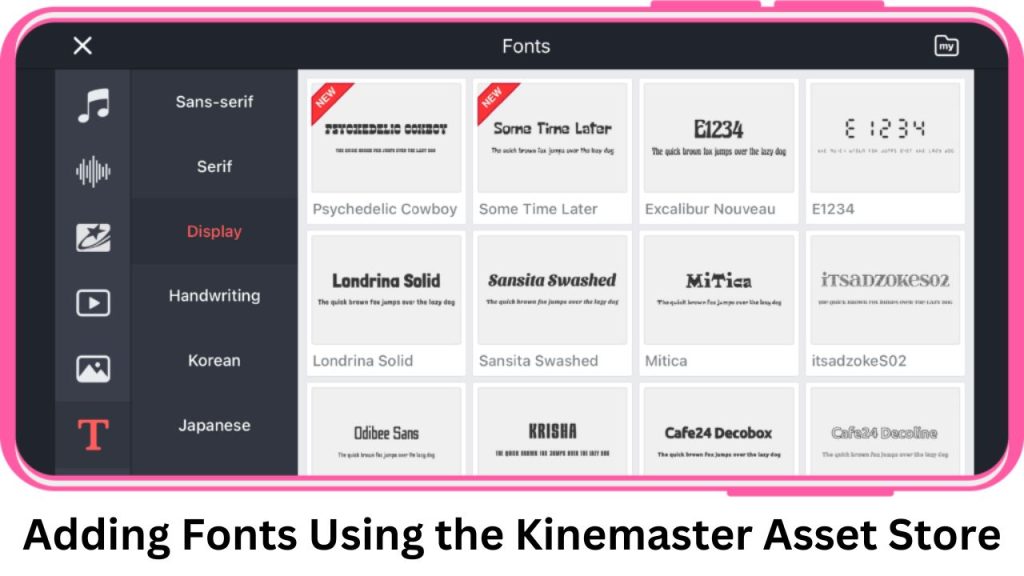
The Kinemaster Asset store is a free resource provided by Kinemaster which allows users to easily browse and download various types of assets including fonts for use in their projects.
To access this feature, simply open up the Kinemaster interface, tap on the ‘Asset’ tab at the top of your screen and select ‘Font’ from the list. You can then browse through a selection of available fonts and pick one that best suits your project needs!
2. Installing Fonts Manually
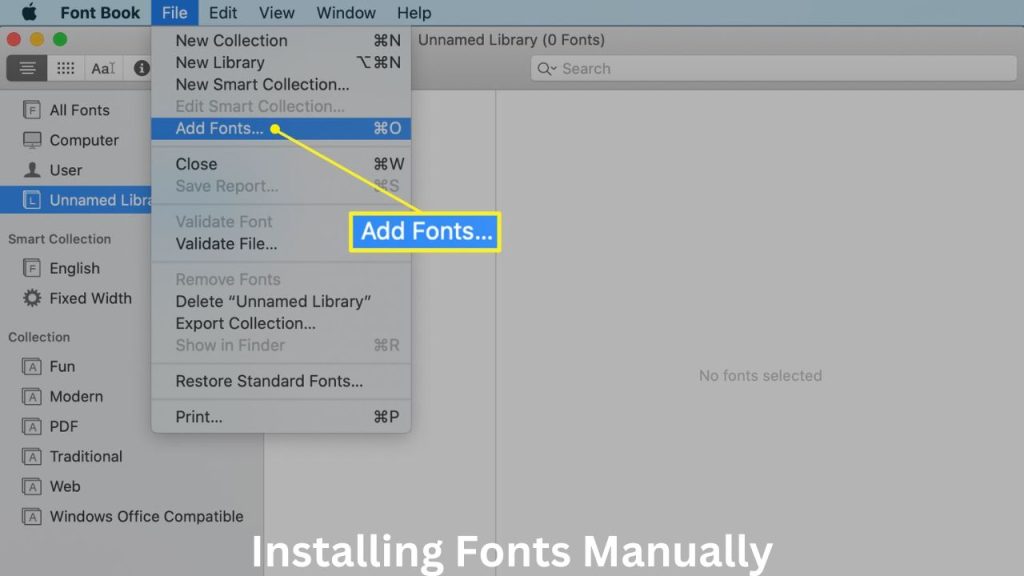
If you don’t find any suitable fonts in the Asset Store, you can always try installing them manually. To do this, simply download the font files from a reliable web source and transfer them to your device.
You can then open up the Kinemaster interface and tap on the ‘Settings’ tab at the top of your screen. Here you will find an option to manually install fonts that you have downloaded.
3. Installing Third-Party Font Packs

If installing fonts manually seems like too much work for you, there are many third-party font packs available in the app stores that have been specifically designed for use with Kinemaster.
These packs come preloaded with a variety of different fonts ranging from basic types such as Arial and Times New Roman to more elaborate ones like Comic Sans or Brush Script MT. All you need to do is download the font pack of your choice and follow the instructions provided to install it.
These are just a few methods you can use to add new fonts to Kinemaster. We hope you find them helpful in creating more visually appealing projects.
How To Import Fonts Into Kinemaster IOS?
Importing fonts into Kinemaster is a relatively easy process on an iOS device. First, you will need to install the Fonts app from the Apple App Store. This app allows you to access and manage your system fonts, as well as download new ones.
Once installed, open the Fonts app and select “Download New Fonts”. Here, you can browse through a wide selection of font families that are available for download. When you find one that you like, simply tap “Download” to add it to the list of available fonts in the macOS system.
Open Kinemaster now, then click “Settings” in the lower right area of the screen. Tap on “Custom Fonts” and then select the newly downloaded font from the list. This will add it to Kinemaster and you can start using it immediately in your projects.
There is nothing further to say. This short guide will show you how to quickly import fonts into Kinemaster for iOS devices. Enjoy experimenting with different styles and fonts to create unique visuals for your videos.
What Is Km Font Installer?
KM Font Installer is a new and improved way of installing fonts into Kinemaster. This app offers an intuitive user interface that allows users to quickly browse through a selection of available fonts, search for specific ones and install them directly from the app.
The KM Font Installer supports both online and offline downloads, so you can always find the perfect font for your project even if you’re on the go.
For those who are looking to take their video projects to the next level, KM Font Installer provides an easy option to add stylish typography without any hassle.
Now there’s no need to manually download and install fonts one by one – just pick one from this convenient app.
Also Read:
Conclusion
Kinemaster is a great tool for creating amazing videos and adding fonts is just one of the many ways you can take your projects to the next level.
We hope this guide has helped you understand how to add fonts in Kinemaster. By following the steps listed above, you’ll be able to quickly and easily customize your videos with a variety of stylish fonts. Thanks for reading.
![How To Use Chroma Key In Kinemaster? [2023]](https://kinemasterproapk.cc/wp-content/uploads/2023/01/kim-03-768x512.png)


![How To Add Background In Kinemaster [Step-by-Step Guide]](https://kinemasterproapk.cc/wp-content/uploads/2023/01/How-To-Add-Background-In-Kinemaster-2-768x432.jpg)